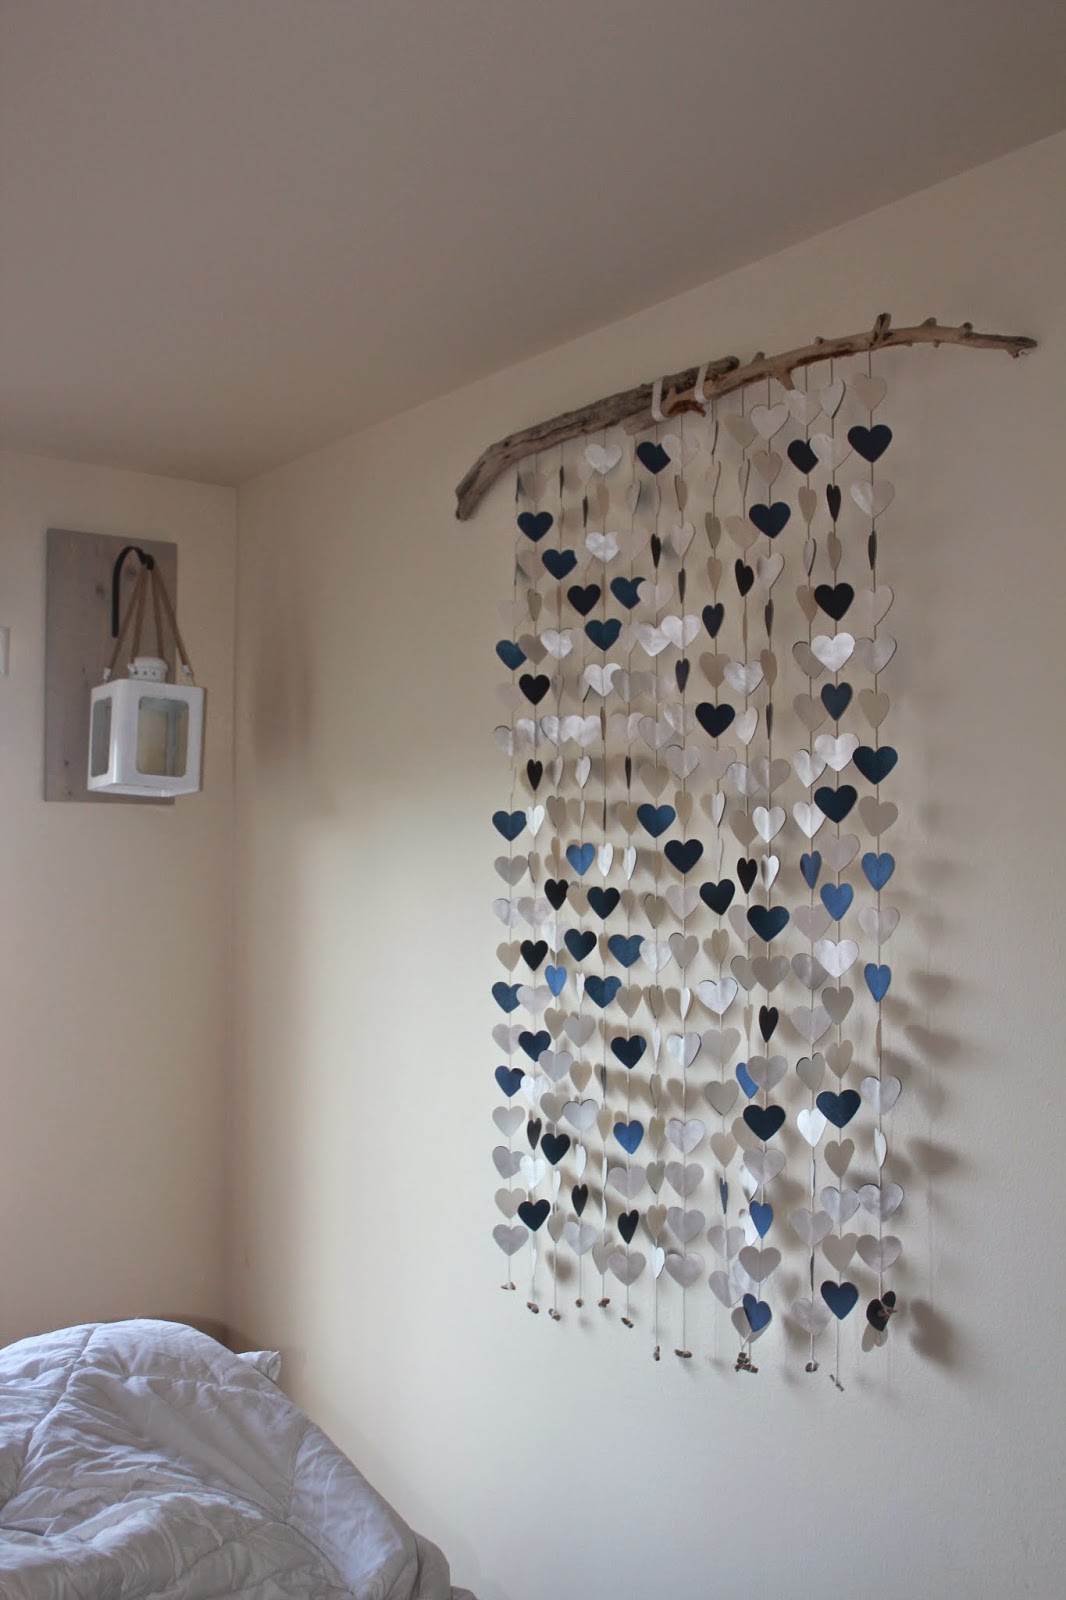
In 2011 I made the entire invitation suite for our wedding out of Star Dream Lapis Lazuli and Crystal paper. I had a lot of paper leftover afterwards! I used a paper punch to cut a ratio of 3 white hearts to every blue heart. I then utilized white cotton string and installed the hearts double-sided. I was inspired to make this piece to mimic how we decorated our getaway car at our wedding reception. This hangs directly at the foot of our bed slightly away from the wall and it is always moving in the sea breeze. This piece helps create a relaxing space in our bedroom.
Wavy Stitches
Sunday, April 12, 2015
Wall Art
I made this piece shortly after we moved to California. I found the large driftwood pieces while I was walking the coast near Redondo Beach and I found the small pieces near White Point. The small pieces help weigh the strings and keep them from getting too tangled in the wind.
In 2011 I made the entire invitation suite for our wedding out of Star Dream Lapis Lazuli and Crystal paper. I had a lot of paper leftover afterwards! I used a paper punch to cut a ratio of 3 white hearts to every blue heart. I then utilized white cotton string and installed the hearts double-sided. I was inspired to make this piece to mimic how we decorated our getaway car at our wedding reception. This hangs directly at the foot of our bed slightly away from the wall and it is always moving in the sea breeze. This piece helps create a relaxing space in our bedroom.
Sunday, March 22, 2015
“Use it up, wear it out, make it do or do without.”
"Use it up, wear it out, make it do, or do without."
I strive to balance this mantra with other principles of organization as I continue in my forced small living experience. I always try to re-purpose worn out items in my home to serve a new function and avoid a new purchase. At the same time, if an item can't be re-purposed quickly, it's gotta go.
One of the interesting things about living in California is that fashion can be dirt cheap or outrageously expensive. I like visiting a store called Heavenly Couture to pick up really inexpensive trendy accessories like sunglasses and scarves. Last summer I purchased a beautiful black and white tribal print circular scarf with red tasseled trim for $12. Cheaper than Target!
I wore that scarf over and over. Loved it! Eventually, the red trim bled into the white tribal print in an unattractive manner and my cheap scarf could not be refreshed. I used a seam ripper to remove the still vibrant trim from the scarf and put it away for another sewing use. The scarf itself is a very thin weave and I decided that I could make lavender sachets for our shoe bin instead of purchasing sachets from Homegoods.
I purchased some loose lavender in 2013 at the Ojai Lavender festival. I've used half the bag for other projects but I still had 2 or 3 cups to put to use. I cut some simple squares from my beloved scarf and quickly stitched up the sachets making use of the rest of the lavender. The remainder of the scarf fabric has been put away in my fabric drawers. This is a simple project but an excellent exercise for myself as I try to embrace our tiny house.
Sunday, March 1, 2015
Small Space
My current master bedroom is smaller than my childhood bedroom. My college dorms have all been larger than my current apartment. The house I rented alone in Georgia before we got married was bigger than the apartment we rent now. We have tasted the sweetness of comfortable, affordable housing and California demands we forget it. I crave square footage like your dieting friend craves pizza.
Taking up sewing as a hobby in California has been a challenge. Sewing and the accumulation of material goods goes hand in hand. The fabric stash. The notions. The projects in progress. I have spent hours feeding my square footage addiction by gorging on craft room porn and fabric stashes that ooze material indulgence.
I discovered this fall that my fabric collection was growing rather than shrinking. At Christmas I received fantastic gifts of new fabric, estate sale fabric lots, and notions that made my heart sing! My plastic tote storage strategy was failing. I couldn't quickly access the fabrics and the totes were choking the closet they occupied. I pulled everything out and piled it up so I could get an idea of how much there was. After explaining my dilemma to Quentin he agreed to help me find a solution at the Long Beach Antique Market.
We found these great metal drawers that were perfect for my application. I think we spent $160 for 12 drawers. The drawers lock together in an earthquake friendly fashion, they are visually on trend, and the footprint of these drawers is far less than the plastic tubs! After we got these home I realized they were manufactured in Akron, Ohio (my childhood hometown)!
It took me a week to purge useless material, wash, iron, fold, and load the fabric into the drawers and the result is perfect and astonishingly better for our space! Can you believe that massive pile fit in these drawers?!
If I ever reach a sewing state of minimalism, the boxes can easily be repurposed in our home. Quentin sanded the green units, finished them with gray paint, and I lined them with some magnolia wallpaper.
It took me a week to purge useless material, wash, iron, fold, and load the fabric into the drawers and the result is perfect and astonishingly better for our space! Can you believe that massive pile fit in these drawers?!
My hobby must stay contained by these drawers or I'll face a painful purge. I'm excited by some beautiful projects I have in the works for 2015!
Sunday, February 15, 2015
Sewing Buddy
It's hard to work with active kitties watching my every move. Murphy loves to watch the spool spin and I have to take him with me when I leave the room or he will steal the thread and make a mess!
Sunday, January 11, 2015
Curtains for Days
I had a second sewing project for the bus before we left on our great road trip. We needed curtains for the bus to provide some light insulation and to act as a security measure for when we left the bus in metropolitan areas. Now, the curtains were very much a priority for me but not so much for the guys (with good reason). So, while the guys did an amazing marathon of improvements to the bus, my mom and I set out to solve the curtain dilemma.
We had a number of constraints to consider. We needed to keep the costs low while still obtaining around 20 yards of fabric. The fabric needed to be thick enough to be non-transparent and light enough to be hung on the inside of the bus with earth magnets. It also had to be visually appealing. That's a tough order at any time of the year, but it felt especially challenging at Christmas when traditional fabrics weren't on sale and inventory was low.
Ultimately my mom and I had a great time trying to accomplish this challenge. We ended up choosing a flocked chevron felt from Jo-Ann Fabric's. We originally wanted only aqua but we quickly realized there actually wasn't enough fabric available in Georgia to achieve that goal. Shipping the fabric from Jo-Ann's website would have been a disaster because it was so close to the holidays. We ultimately decided to do half aqua and half gray and only had to visit two locations. We decided to alternate the colors every two windows to cohesively use the two fabrics. I did some quick envelope math to decide how much fabric we needed and we walked away with around 12 yards of each color. I spent right around $150 including tax for 24+ yards of fabric.
When we got home I cut the felt to size so that each panel covered two windows on the bus. The felt was a great choice of fabric because I didn't have to sew single hem! I sewed a small 1 inch patch over an earth magnet in the corner of each panel of fabric and the task was quickly done. At the end of the project, it became clear that my math was way off and I ended up with several yards of each color leftover. I used some of the leftovers to cover an AV cabinet on the bus and the rest of the fabric now lives under a couch on the bus.
The installed curtains were exactly what we were looking for! They were easily removed and replaced as needed by passengers. As an added bonus, the felt really repels dirt!
In Utah the bus blew a high pressured fuel line. It was around midnight and snow was falling. The engine trouble resulted in a lot of noxious fumes coming out of the engine (located inside the bus). We had to drop the windows so we could breathe and that's when the curtains really came in handy! The felt kept a lot of the snow out of the bus and still let us get fresh air. The curtains were very helpful for the entire trip but this one application was worth all the effort!
We had a number of constraints to consider. We needed to keep the costs low while still obtaining around 20 yards of fabric. The fabric needed to be thick enough to be non-transparent and light enough to be hung on the inside of the bus with earth magnets. It also had to be visually appealing. That's a tough order at any time of the year, but it felt especially challenging at Christmas when traditional fabrics weren't on sale and inventory was low.
Ultimately my mom and I had a great time trying to accomplish this challenge. We ended up choosing a flocked chevron felt from Jo-Ann Fabric's. We originally wanted only aqua but we quickly realized there actually wasn't enough fabric available in Georgia to achieve that goal. Shipping the fabric from Jo-Ann's website would have been a disaster because it was so close to the holidays. We ultimately decided to do half aqua and half gray and only had to visit two locations. We decided to alternate the colors every two windows to cohesively use the two fabrics. I did some quick envelope math to decide how much fabric we needed and we walked away with around 12 yards of each color. I spent right around $150 including tax for 24+ yards of fabric.
When we got home I cut the felt to size so that each panel covered two windows on the bus. The felt was a great choice of fabric because I didn't have to sew single hem! I sewed a small 1 inch patch over an earth magnet in the corner of each panel of fabric and the task was quickly done. At the end of the project, it became clear that my math was way off and I ended up with several yards of each color leftover. I used some of the leftovers to cover an AV cabinet on the bus and the rest of the fabric now lives under a couch on the bus.
Installation! |
Inside view during the first breakdown of the trip. |
Curtains are riding low for maximum views. |
Friday, January 9, 2015
Sewing in 3D.
We own a school bus. A full length beast of a school bus. The bus lived in Georgia until we decided we were ready to bring it to California over the holidays. We went home to Georgia on December 20th and left on December 26th for a cross-country road trip with 10 of our best friends. Before we left on the trip we had some serious improvements to do. Quentin, his brother, and our best buds painted the exterior, did some rewiring, and engine work in the days before we left. I packed my sewing machine in a carry-on and made a new seat cover for the bus seat while I was in Georgia.
The original bus seat had a brown textured vinyl seat that was cracked and tired. The vinyl was attached with staples to a very simple frame and the pieces were easily removed. I took the vinyl apart and used the pieces as a pattern for the new cover. The seat itself is a molded foam that we did not replace. This was my first attempt at sewing something 3D and the result was great! The bottom piece is very tight fitting. I was able to wrap the seatback with some batting before putting the fabric sleeve on. The most difficult part of this process was using the staple gun to secure the fabric again. My mom helped me but we were very unskilled in the hand tool department. I shot a lot of staples at my feet during the process.
I considered using elastic so the fabric could be removable but we were on a serious time crunch and I didn't have time to get anything wrong. I also wanted a very snug fit for comfort. I retained the pattern pieces so I can remake another seat cover down the road if this one fails or gets stained. I think the seat has a lot of character now!
Sunday, November 9, 2014
Work Space
Our apartment is not big enough for a legitimate dining table. After doing some research I discovered the world of expandable tables! New tables cost several thousand dollars so I needed a vintage solution. I was trying to obtain a table that had at least 3 hardwood leaves for $400 or less. I was so pleased to purchase this beauty from Craigslist for $95! This table was owned by a one L.A. family for generations. This piece has some ornamental damage but I was able to find replacement pieces online.
When I'm working on a big quilt I can expand the table and put in all my leaves for a great work space. When I'm just repairing clothes or working on tiny pieces the desk fits well against a wall in our living room.
Subscribe to:
Posts (Atom)